
In this article, we will learn how to install Proxmox. Proxmox is an Debian-based open-source virtualization environment.
In short it is a direct alternative to VMware’s ESXI. Essentially it allows you to create and manage up different virtual machines as well as containers. Proxmox is a what virtualization guys call a type-1 hypervisor. If you want to learn more about the two different types of hypervisors I suggest watching this video for a detailed explanation. For now just know that a type 1 hypervisor is a bare metal virtualization platform that can run different operating systems virtually.
Proxmox is free. That said, they do offer a license that will give you paid support. Let’s get started!
Prerequisites
- A physical or dedicated server.
- 64bit CPU.
- At least 1GB of RAM (and additional RAM needed for guests).
- A USB stick with at least 1GB.
Step 1: Download Proxmox ISO Image
- Open a web browser and navigate to the official Proxmox Downloads page and select Proxmox Virtual Environment.

- Select ISO Images to continue.

- Click Download and save the file.

Step 2: Creating a Bootable Proxmox VE USB Drive
To write the ISO image to a USB, you can use a tool like Etcher for Windows, Mac, or Linux.
- After you download and launch Etcher, select the Proxmox VE ISO image, select your USB drive, then Flash! This will write the ISO image to the USB.

- Once it’s finished writing, boot your server/pc from the Proxmox USB drive.
Step 3: Proxmox Setup
If you successfully completed creating the Proxmox bootable USB then you’ll be prompted with a Promox splash page.
- Select Install Proxmox VE.

- Select I agree if you agree with the EULA.

- Select the Target Harddisk where you’d like to install Proxmox VE.
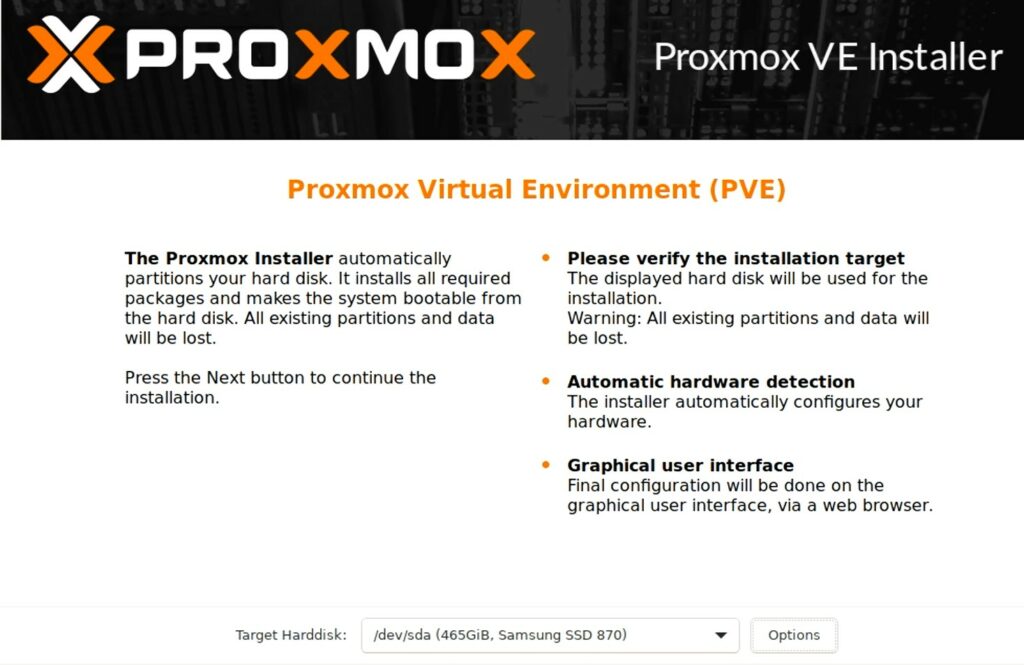
⚠️ Selecting options will allow you to configure software RAID. You also have the option of using other file systems (Ext4 for example) but in this example I’m only using one hard drive for now. Select OK and then proceed to the next step.
- Select your Country, Timezone, and Keyboard Layout, then proceed.

- Enter in a password and email address.

⚠️ The email address is just used for alert notifications such as backup failures, and high availability events.
- Select the correct Management Interface, enter in a Hostname, then set the IP address, Gateway, and DNS.
⚠️ Highly advise either setting up a static IP address or DHCP reservation so that the IP address never changes.

- Confirm all the settings are correct on the Summary page then proceed to install.

- Once installation is complete you will be able to access Proxmox webui by navigating to the IP address and port.
https://YOUR_PROXMOX_IP:8006
- Login with the username root and your password.

Step 4: Fix Software Updates
- On the left column, click the name of your Proxmox node, then click the Shell button on the top right.
A new window should open with a command line on the server. You will need to type in the five commands below to accomplish the following:
- Move to the directory where Advanced Package Tool (APT) looks for software update repositories
cd /etc/apt/sources.list.d
- Rename the Enterprise configuration file to have .disabled at the end so it is ignored by APT
mv pve-enterprise.list pve-enterprise.list.disabled
- Create a configuration file for the Community repository
echo 'deb http://download.proxmox.com/debian/pve buster pve-no-subscription' > pve-community.list
We can verify the repo was added by going to Updates > Repositories and Select Reload.

- Update APT’s package list
apt update
- Install all available software updates
apt -y dist-upgrade
- Once it’s finished, reboot.
reboot
Step 5: Create a VM
Now, you’re ready to set up your first virtual machine. Select Create VM in the top right to create your first virtual machine hosted on Proxmox.
Conclusion
Next time we’ll discuss how to create your first VM (Virtual Machine) in Proxmox so stay tuned!
Thanks for reading!